Thursday, November 25, 2010

Everything's Lame But The Tart


I had a total lame-o mommy day, today (this was actually yesterday). Some mornings you wake up and just don't feel like being a mom. You want a vacation, a break, a massage...a margarita.

That wasn't happening, so I schlepped the kids to Target, our go-to place for fun and excitement! See told ya, I was lame.

Normally, I attack a Target shopping errand like Lara Croft would attack a mission to retrieve a highly-prized, ridiculously expensive artifact from some ancient Chinese culture- quick, with strategy and armed...with snacks. Today? Well, I didn't  really bother. Not with the diaper bag or even a smidge of make-up. Sports bra? check. Frumpy tank top? (yes, we are still wearing tank tops here in jungle steamy Houston) Check. Helping to support the stay-at-home-don't-give-a-crap mom stereo-type? Check. Hmmm...The Real Housewives ain't got nothin' on me. Okay, maybe I do need a wig and a glass of chardonnay with a couple ice cubes in it.

Back to the actual story and then, yes, THEN a recipe. I've yet to figure out how I'm going to segway into that.

It was just one of those days where I didn't care if we walked around Target for hours. Normally, I can get in and out in 20 minutes, with 3 kids. I mean, that's pretty good. Well, that's if they hang on the sides of the cart, which I normally make them do, so I can go faster. Lara Croft would totally approve of fast and unsafe strategies.

I let the kids get ONE stupid, made-in-china, possibly-lethal-paint-coated-toy each. Normally, I whiz right by. If you act like your in a big, serious hurry, you can usually get by that crap-toy trap without a peep. Not today. Because I was in slow-mo and didn't give a flyin' fig, I let them dive-in, head first.

For some reason, ONE toy is a very difficult concept for three year-olds to understand. They must have thought I said, "One ARMFUL each."

Then we get to the Christmas aisle. Oh Lord. I get giddy and have to touch everything just like they do. That led us to the Christmas music CD display with the touch pad where you can sample the CDs before you buy them. Like I said before, if this was a mission-kind-of-day, I would speed by without even a thought of "sampling", but today I parked the cart right in front of it and let the kids push the buttons into oblivion.

I was not surprised that the Mickey Mouse Christmas Special Extravaganza Musical Music Blowout Disney Supercalifragilistic Best of the Season Special Album got the most attention and I was equally not surprised that I wanted to bash my head into the shopping cart handle to find relief from Mickey's incredibly annoying, someone's-squeezing-his-nether-regional-area voice.

The children? Well, they were in "mousie" heaven. Boo was galloping around in circles claiming Goofy was singing a "cowboy" song, while Bubba acted as operational engineer of this button-pushing carousel of holiday hell.

I guess, it really wasn't that bad. I was actually enjoying every minute of it. I loved that Boo thought "Jingle Bells" was a country song and Tiny was clapping randomly and squealing as he watched his sister do her awkward dance. We stood there for a good 10 minutes, wearing down that display and most likely scaring away anyone who was mildly interested in a Crooner's Christmas with 'Ol Blue Eyes.

I am really thankful for my kids. I'm really thankful I am a mom. I'm so thankful for those silly moments that I can take and tuck away into my heart. I guess it wasn't so lame afterall, more like pretty much perfect- except for the fact that I still looked like the poster-child for Help A Fashion-Challenged Mom Foundation.

Alright. Are you ready for a recipe? If you're not, I'm going to start talking about poop diapers...

Okay.

This recipe was going to be for the Challenge 8 of PFB. It turned out really well. I've never made any kind of tart tatin before. I took Rachel Allen's recipe for Apple Tart Tatin and substituted fresh pumpkin for the apple, came up with a brown butter rum ice cream on the fly and topped it all off with salty, crunchy pumpkin seeds. It totally satisfied my love of salty-sweet.

So with summer garb and non-autumnal weather outside, I was trying to usher the chilly air with this little number. I hope you enjoy.

Git yer pumpkin. (don't ask.)

Slice off the top...

take off its jacket.

scoop out the seeds and reserve.

rinse and dry really well.

cut pumpkin into slices

I used a cookie cutter for the centerpiece.

practice your slices in the pan to make sure they fit.

my addition: spices. Nutmeg, cinnamon, clove and ginger.

Toss with your pumpkin pieces.

until they are well coated.

roll out and cut pie crust to size. (if in a pinch you could use a pre-made pie crust pastry)

make your caramel...so fun and kinda scary.

cook your pumpkin in the caramel and top with crust.

bake until golden and pumpkin tender.

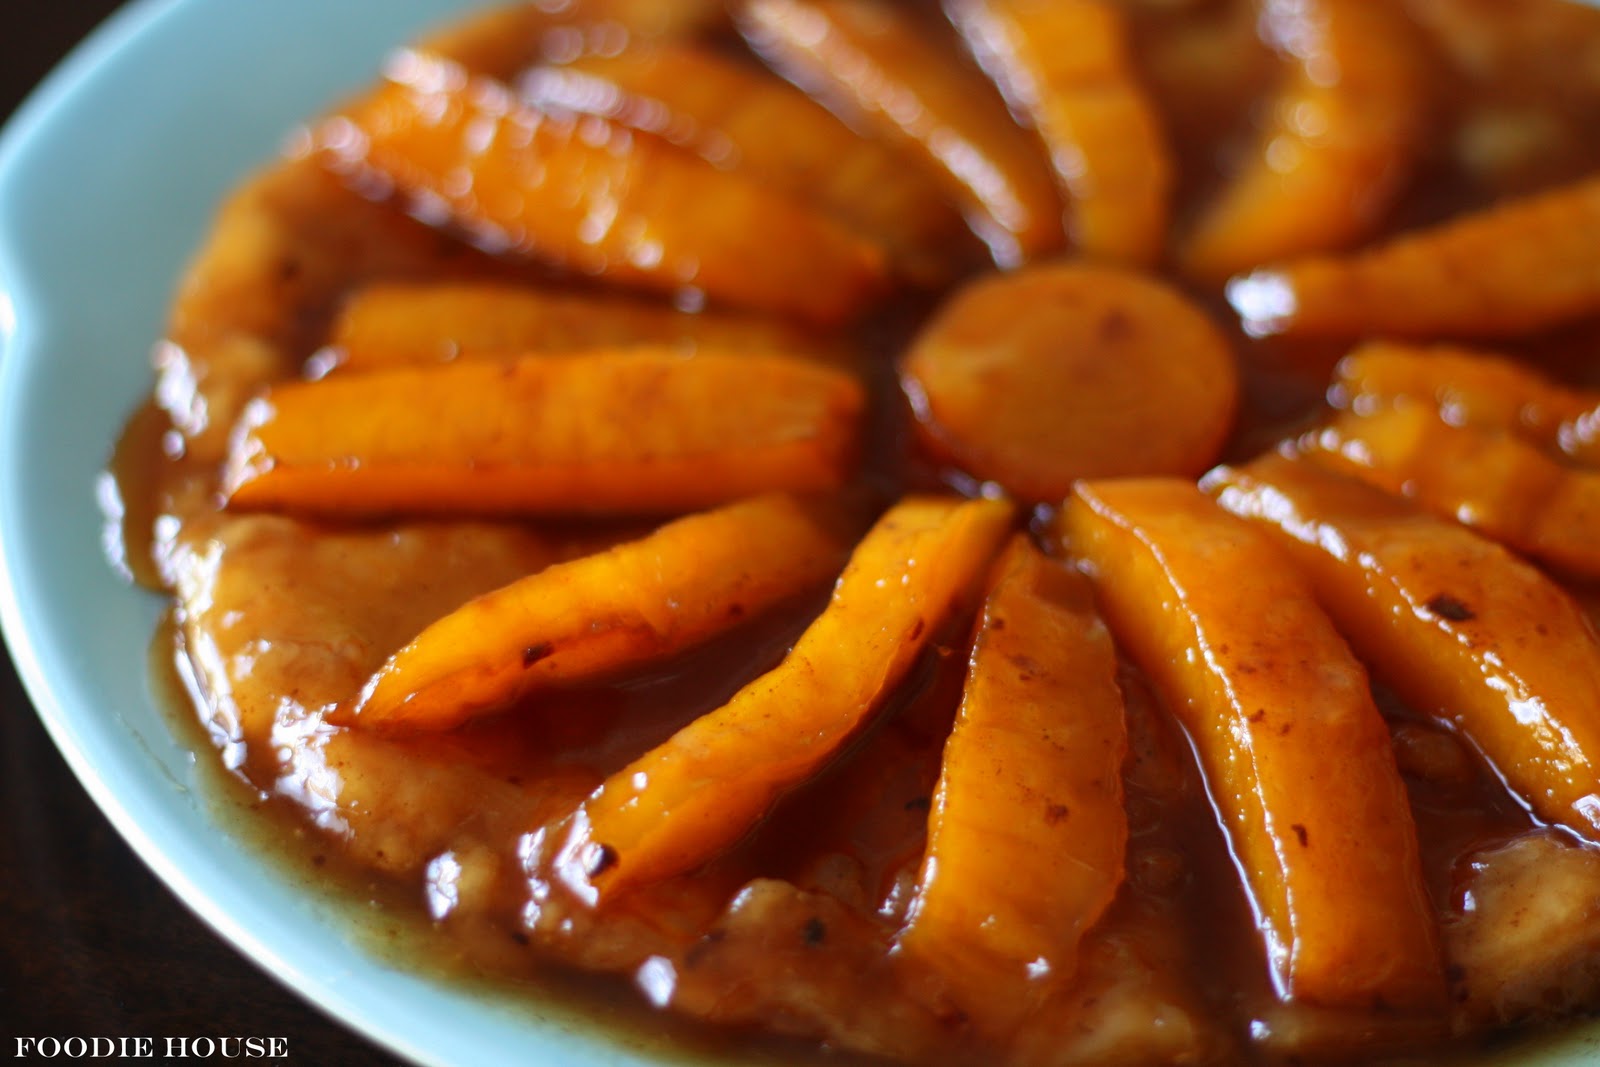
gaze at its beauty...

take your toasted pumpkin seeds
 (and shove it...just kidding. Any time I hear some one say, "Take your..." I want to say, "and shove it.")

and top your slice of pumpkin tart tatin, along with some brown butter rum ice cream.

really difficult part...eating.

Pumpkin Tart Tatin
adapted from Rachel Allen's Apple Tart Tatin Recipe

I'm going to leave the recipe as is, in case you want to make it with apples and I will put my changes in bold.

200 g (1 1/2 cups) plain flour, sifted

1 pinches salt

100 g (7 tbsp.) butter, chilled and cubed

2 tbsp soured cream, or crème fraîche

For the filling

Approx. 3/4 of a small pumpkin, peeled and cut into slices or 4 eating apples, GrannySmith or Golden Delicious; if using a small variety, such as Cox’s Orange Pippin, you will need about 6 apples

1/2 tsp. EACH cinnamon, ginger, nutmeg and clove ( if you like you can add these spices to a apple tart too)
125 g (1 1/4 cups) caster sugar

100 ml (scant 1/2 cup) water

25 g (2 tbsp.) butter

1 egg, beaten

Method

1. For the sour cream shortcrust pastry: place the flour, salt and butter in a food processor and whiz briefly. Add half the sour cream and continue to whiz. You might add a little more sour cream, but not too much as the mixture should be just moist enough to come together. If making by hand, rub the butter into the flour until it resembles coarse breadcrumbs then, using your hands, add just enough sour cream to bring it together.

2. With your hands, flatten out the ball of dough until it is about 2cm thick, then wrap in cling film or place in a plastic bag and leave in the fridge for at least 30 minutes or, if you are pushed for time, in the freezer for 10–15 minutes.

3. Preheat the oven to 200ºC (400 degrees F)

4. For the filling: prepare the apples, by peeling them with a peeler to keep them in a nice rounded shape, then cut into quarters. Remove the core from each quarter and set aside. Don’t worry if they go brown, and don’t cover in water or they will be too wet. (Toss pumpkin pieces in spices)

5. Place the sugar and water in a medium-sized ovenproof saucepan set over a low–medium heat and stir until the sugar dissolves.
(follow the recipe as is, substituting pumpkin for apple)
6. Increase the heat and boil the syrup until it starts to caramelise around the edges – about 5 minutes. Do not stir once it has come to the boil otherwise the syrup will crystallise. Once the syrup starts to turn golden, you may need to swirl the pan slightly to even out the caramelisation.

7. Once the syrup is a golden caramel in colour, add the butter and swirl the pan again to distribute it through the caramel.

8. Remove the pan from the heat, and place the apple quarters in a concentric circle around the outside and any remaining pieces in the centre, keeping in mind that the tart will be flipped over when serving. The apples must completely cover the base of the pan; you may need an extra apple!

9. Place the pan back over a medium heat and cook for 10 minutes to slightly caramelise the apples, while you roll out the pastry.

10. Roll the pastry out on a lightly floured work surface to a disc about 2cm wider in diameter than the pan. Remove the pan from the heat and place the pastry on top of the almost cooked apples. Using the base of a spoon or a fork, tuck the pastry in around the edges of the apples. Brush the pastry with beaten egg then, using a skewer or fork, prick a few holes in the pastry.

11. Bake in the oven for 25 minutes or until the pastry is golden and the apples feel cooked when you insert a skewer through the centre.

12. Remove from the oven and allow to stand for just a few minutes before placing a plate on top of the pan and carefully (it is hot!) but quickly flipping it out. Use a plate with a slight lip to catch the delicious juices. Cut into slices to serve. Serve with ice cream and pumpkin seeds.

Pumpkin Seeds

Seeds from one pumpkin
salt

Heat oven to 400 degrees. Rinse and dry pumpkin seeds. Sprinkle lightly with salt. Spread evenly on baking sheet and bake until fragrant and crunchy, about 20 minutes. Just try and stop yourself from eating all of them before the tart is finished.

Brown Butter Rum Ice Cream

2 tbsp. butter
2 cups heavy cream
2 cups milk
2 eggs
1/2 cup sugar
1 tsp. vanilla
2 tbsp. dark rum

In a heavy pan melt butter and let it get golden brown and fragrant. Add milk and cream. Let it come to simmer. Meanwhile beat eggs and sugar with a fork, until creamy and lighter in color. Add a bit of the hot milk to the eggs to temper them. Then add the egg mixture into the saucepan with the rest of the milk. Stir over med-low heat until it thickens and coats the back of a spoon.

Add vanilla and rum off heat. chill in fridge until cold or in an ice bath. Follow your ice cream makers instructions.

Happy Thanksgiving, Foodies!

P.s. Thank you for all your really, really sweet comments on my "Dumped" post. I cannot tell you how warm and fuzzy it makes me. I'm super thankful for you, my readers.


Monday, November 22, 2010

Dumped..PFB Style

I was flushed, chopped, aced, sacked, dumped, let go- however you like to say it, along with a few other fabulous bloggers in Project Food Blog 2010, Challenge #7. I've had some time to lick my wounds and there's three response options I have to choose from: one, be mad and bitter; two, take it on the chin with a smile or three, make myself a chocolate milkshake and cry in it. I did the last one. And it tasted good.

The challenges themselves were one of my favorite things of the entire contest. Normally I would tell you that I love being able to blog about whatever I want, whenever I want, BUT having perimeters put on how and when you blog creates a pressure cooker of creative madness. I love those boundaries because it gets the juices flowing and makes me uncomfortable, thus, building my confidence as I try new things- even if those things don't always turn out perfect.

Along with the personal challenges and creative bursts I loved gaining new readers and in turn, finding so many new blogs to visit! I was overwhelmed by the creativity and skills of all the contestants and greatly touched by the comments and well-wishes from so many readers. If anything, this contest gave my still-infant blog a great boost.

I learned that I can make a petit four with much perseverance; work the eighties hair while eating out of my Project Food Blog cooler; make a sandwich into a pizza with a romantic narrative garnish; I could cook things I never imagined- i.e. liver- and learn what I thought I already knew...I don't like it; have one of the best birthdays ever and record it in a post; and finally, put my real-life chocolate emergency into a video with bad British accents and a schmear of chocolate on my face.


Thank you for all your love and support. Couldn't have done it without you.

Love ya, Foodies!

Wednesday, November 17, 2010

Today...

Today (which was really yesterday)...

~ I realized my wonky, hand-crafted, crotchet key cozy is not going to work, despite my craftsmanship.

~I finally, inwardly, agreed with my husband that it's embarrassing and stupid-looking. It looks like a granny square ate my car key.

~I also remembered that it was the same husband that bought a clunky, dumpy mini-van with a ONE car key which happened to be BROKEN, as in, no way to attach it to a keyring. I'm going to make him wear the discarded key holder as an ear warmer.

~Because of my haphazard-ish house-keeping, I discovered that if my bra rests on top of my computer charger, it will warm it up for me before I put it on. I think I should call Sky Mall.


~I could not stop laughing at my daughter's comedic timing that is emerging from her three-year old mouth. She now makes a funny statement, pauses and then says, "wah-wah".  (have no idea where she got that.) So, it went a little something like this: "The Pillow-Pet farted!" (blaming someone's flatulence on her bumble bee plush) Pause. "Wah-wah!" I, of course, bust out laughing, which further encourages it. Yes, I let my kids say, "fart".


~My hairdryer died. I knew something was up when it sounded like a 747 warming up and smelled like burnt hair.

~I've decided to indulge in reading my new Food and Wine magazine, while Gordon Ramsey bleeps his way through an hour of Kitchen Nightmares. Told ya. BBC America, baby. I don't know why I love Gordon so.

Actually, naptime is running out. I've spent most my time doing this post. Tomorrow will have to be Food and Wine time.

Hope you enjoyed this pointless and possibly TMI post. Sorry about the pictures being lame.

Love ya, Foodies.

Um...So I thought I would end it right here, but I was just greeted with the most amusing thing. Amusing in the sense, that I do not understand how a 16 month-old can be so in-tune with removing articles of clothing.

I heard my youngest up in his room crying. I thought maybe it was a lost paci or teething issues. No. Buck-naked with strewn poop diaper and random, rolling turds under his bare feet and on the floor. Only one snap was undone on his sleeper. Just one! And he was able to squirm out of it and pee all over the bed. Half-giggling and half crying, he bobs up and down in his crib with his pale-white adorable bum. I just laughed and laughed as I picked up the poop and wiped off the heels of his feet, back of his knees and under his finger nails. This may sound weird, but these are the days I wish he would never grow up. He's so damn adorable...poop and all.

Apologies that this was more a "mommy" post than a "foodie" post. Poop is so much apart of my daily life and I find it so hilarious that I must share. I guess it would be no surprise to you that Dumb and Dumber is one of my all-time favorite movies...yes, that scene.

Monday, November 15, 2010

Morning Brick

I don't know about you, but when I hear "Morning Brick" I think of something...get ready for it, I'm going to be unpleasant...something you "drop" in your toilet after your a.m. coffee, but this is the contrary, it's something you eat. Hmmm. This isn't coming across quite the way I planned, but I'm half-awake and have to finish this post before the kids get up, so no time for editing. This is unrated, folks. Alright, that was about it. Actually, nothing too exciting. You can tell I'm a mom. I will say, I do tend to have the humor of an 8 year-old boy at times.

So! What's a Morning Brick, other than what I've described above? (and if this is your first time visiting this blog, please, please don't think I start all my posts this way.) It's my version of protein bar, or Clif bar or energy bar or some sort of protein/carby health bar that will get you going in the morning (oh my gosh, not another pun. Okay, didn't mean that.)

It all started when I was getting tired of being shaky in the morning after drinking my coffee on an empty stomach. I noticed that if I ate a protein bar first, I would not feel bad. So I started buying Clif bars every week. When on sale, they are a dollar a piece, when they are not, it's more like $1.50. Take that times 7 and your looking at quite a hefty price for just some nuts, fruits and oatmeal, which is only 30% organic. GASP! I then became determined to make my own out of what I had in the pantry. Mine end up being, oh I don't know, maybe 60-70% organic. Better and cheaper.

Since I love chocolate and peanut butter, I grabbed those (not chocolate chips- cocoa powder and unsweetened peanut butter) and some old-fashioned oats. Started adding agave for the sweetener, flax seed just 'cuz, and started mixing. First batch was too cocoa-y. It was like chalk. But the second time it was better. Six tries later, I think I actually have good base, for which many other flavors could start.


Morning Brick- A Foodie House Original

Makes 6-8 hefty bars depending on what pan you use to form them
No BAKE!

2 c. organic, old fashioned oats
1/2 c. organic peanut butter, unsweetened
1 tsp. organic vanilla
1/4 c. cocoa
1/3 c. organic agave nectar
2/3 c. your favorite protein powder (I use whey)
2 tbsp. flax seed meal
1/4 c. hot water, plus a tbsp. more (but reserve for the end)

Mix together peanut butter, vanilla, cocoa, agave, protein, flax seed meal, 1/4 c. hot water. A nice paste will form. Add oats and mix really well. It will be dry and crumbly (you can do this in your mixer if you want). You want it to be in big crumbles, not tiny uber dry ones. If it's too dry add that tbsp of water. If it gets too wet it will be hard to form but still taste good.

Line a loaf pan with parchment paper. Put mixture in and using parchment flaps, press mixture down into pan. Take a second loaf pan and press down on top of the mixture to make a solid "brick". Let it firm up in frig for at least an hour (or overnight) before cutting with a very sharp knife.

Oh, guess what? Voting starts today! So, if you liked my Emergency Cake Video for the Project Food Blog contest...


CLICK HERE TO VOTE!

Thank you so much for your support!
Love ya, Foodies!

Saturday, November 13, 2010

PFB Challenge #7: Emergency Cake Video

It was an emergency...where I just happened to be wearing false eyelashes.

VOTE HERE!

With each challenge we get stretched in a new way...and I am loving it! This challenge #7 for Project Food Blog: Video 411, tapped into my long-time desire to have my own cooking show. Since I was a little girl, I've practiced having a cooking show in the kitchen with my mom. Together we came up with skits and characters to show off our cooking chops, all done with tons of laughter and plenty of good memories.

My heart is to show you that cooking always has a story behind it. I love bringing that story to life in a fun, dare I say, campy manner, but not without plenty of how-to information and accessible, drool-worthy recipes.

Every bit of this video was done by me and me alone. Seeing how naptime (once again) is my only time to do blog stuff, it was me, the camera, my imagination and some editing software. If I waited for the Hubs to come home to film for me, it would be too late in the evening, resulting in bad lighting, too much giggling and not enough baking.

The original post for Emergency Cake was done out of a real-life chocolate craving emergency. Nothing would satisfy my craving except for a freshly-baked, dark chocolate-drenched, slightly warm, slice of the moistest, richest, easiest cake ever. Go from mixing to your mouth in just over an hour- well, that's faster than most chocolate cake-toting ambulances.

As I went around and around with ideas for this challenge, what I continued to come back to is one, BE MYSELF and two, make a recipe I dearly love. So that's what I did.
Enjoy the show.


Emergency Cake
(click HERE to see the original post)
adapted from Divvies Chocolate cupcake recipe
Oven: 350 degrees
Makes 6 servings

1 1/2 cups cake flour (not self-rising)
3/4 cup sugar
1/4 cup cocoa powder
1 teaspoon baking soda
1/2 teaspoon salt
5 tablespoons vegetable oil
1 tablespoon white vinegar
1 teaspoon pure vanilla extract
1 1/4 cups water

Preheat oven to 350 degrees. Line an 8x8 cake pan with parchment and spray with pan release; set aside.

In a medium bowl, whisk together flour, sugar, cocoa powder, baking soda, and salt; set aside.

In the bowl of an electric mixer fitted with the paddle attachment (or just use a whisk, works just fine), mix together oil, vinegar, vanilla, and water until well combined. Add flour mixture to the mixer and mix until smooth, scraping down the sides of the bowl with a spatula as necessary. Batter should look and feel more watery than normal cake batters.

Pour batter into prepared pan. Transfer to oven and bake for 35-37 minutes. Cake is done when the center bounces back when gently pressed.  

Let cool 10 minutes in pan then invert to serving plate or wire rack to cool completely...but if it's an emergency, you can eat it warm. Nothing wrong with that, especially if you are pouring warm ganache over the top.

(Honestly, who uses a fork in an emergency?)

To cut it into 6 snack-size pieces, simply cut the cake into thirds then in half. Pour ganache over each slice individually. Serve or cram.


Ganache

1 cup heavy cream, brought just to a boil
1 cup good quality chocolate of you choice (I prefer 60% cacao)


Pour chocolate into hot cream. Whisk until well combined and glossy. Use immediately or let it stand for 15 minutes for a thicker topping. Pour over cake, one slice at a time or over entire cake- your choice.

Thank you so much, Foodies for taking time to watch my video! Voting for this post will begin on Monday the 15th. I will send out a reminder post for you!

I appreciate your support through this entire contest. Your kind words and comments have kept me going and enjoying it all the more. You've gotten me to this challenge, let's continue on to Challenge #8! I've got something delish for you that is pumpkin-licious!

Love ya, Foodies!!

Saturday, November 6, 2010

Did You Know? Fun and Free.


So several weeks ago, I got an okay from Williams Sonoma to take photographs during one of their technique classes that they do on the weekends. I wanted to share this with you because it's fun and free, with a dash of product information, of course.

The Williams Sonoma store here in Sugar Land, Texas, is such a friendly place. The staff is extremely knowledgeable and super helpful. I want to give a special "shout-out" to Maria, who did the actual demonstration- Thank you, Maria!

I tend to get hung up either in the gadget section (either wondering who really needs a strawberry slicer or greatly coveting an expensive, hand-carved wooden spoon to stir my marinara sauce) or at the knife wall. I love knives.


So back to the classes, did you know they had these? I've been on their mailing list for some time now and recently realized that these were free and involved getting to taste food too. Not too bad. Many of you may be saying, "Where's she been? I've know about this for years." If that's the case, please remember, mommies sometimes get very out of the loop, regardless of their foodieness.

I had such a blast taking photos. I felt like a pro...or something.

We all drooled as Maria, the most passionate baker I have ever met, talked to us about apple varieties, showed us different techniques for slicing and chopping. She showcased gadgets and got us all "oohing" and "ahhing".  

I believe the class is to be approximately an hour long. This class went on to be and hour and half. Normally, I would not mind, but the Hubs was trying to keep the 3 tots happy with a bag of graham crackers that just ran out. Needless to say, they were getting antsy. He had already walked them all over the outdoor mall twice, but I wanted to stay long enough to thank Maria, so we waited. The kids kept running up to me and yanking on my leg. I promised them treats that she was making if they were quiet. They did really well. 

The peeps snacking on the goods...see the Hubs in the background (far background) trying to look interested in something? Such a good guy.

Maria made fabulous cakes and a beautiful pie: an apple coffee cake with glaze, pecan muffins, pumpkin pie and that gorgeous molded cake...so pretty.
That was the cake mix she used for the coffee cake...delish.

Isn't this mixer gorgeous? It's a Breville. I didn't bother to look at the price tag, but it did have a timer and a paddle attachment that had mini rubber spatula type thingys on the side to scrape the bowl down as it works. Love that.

This is the apple coffee cake in their "gold" pans. I would love to have a set of those.

Delightful little pecan muffins.


This was the coffee cake made in the speciality pan.

Glaze for the coffee cake, but let's be honest, I was really focusing on that copper pot.


She did not make the pumpkin pie in front of us...

but she did show us how to use those adorable leaf-shaped cutters for the crust. Another favorite thing...

Tasty trio.

I simply wanted to share this because it is a lot of fun, you get to sample the treats, and they have classes on all sorts of things...not just baking. Here's the LINK to check out the schedule. They ask that you call to get your name on the list so they know how many to expect, but other than that, just show up!

So if you spend all your Christmas money at Williams Sonoma like I do, they you may want to check this out and get your foodie on.

P.S. There has been a lot of interest in when the videos will be up for the next challenge of Project Food Blog. I got an email last night saying they are extending it another week, something about issues with copyrighted music. Anyways, you'll have to wait one more week...wish it weren't so. I'm ready to get on with this! But until then I will try to keep you happy with other tidbits.


Love Ya, Foodies!

Thursday, November 4, 2010

Mama Needs Some Comfort

Challenges tend to be challenging...right? This last week's preparations for Challenge #7 for Project Food Blog have left me a bit frustrated. I completed one video last week, then found out we had an extra week to prepare, so I decided to do something different...which lead to more time to think, which in turn, led to more ideas and another video. In that time, I lost two days of filming (well, two naptimes worth) to a "corrupt" disc. I don't know how that happened. I had my 15 minutes of pouting and got back to work. I'm really hoping you like what I've done. It's one part campy ridiculousness and one part informative recipe demonstration (kinda like the blog), which hopefully will equal your enjoyment.

I found myself furiously chopping zucchini innards, for the recipe I'm about to share with you, and realized how stressed I was. What I needed was a really comforting, cozy meal to get me back on track. So I give you these adorable stuffed zucchinis, which are a marriage of Italian and Lebanese flavors, baked to tender perfection and served piping hot. Oh! Did I mention that we actually had some cool weather to serve these with? Yes, a chilly 55 degrees outside. Finally! Some appropriate seasonal weather- cannot stress to you how happy it makes me.

Stuffed Zucchinis

6 servings
Oven 400 degrees

1 lb. ground beef
1 tsp. allspice
pinch ground clove
salt and pepper
2/3 cup favorite marinara sauce
2-3 slices provolone cheese
1/4 cup grated Parmesan cheese
6 small round zucchinis


Start by preheating your oven to 400 degree. Brown the meat with the spices, salt and pepper. Add the marinara sauce and let simmer. Meanwhile, cut the tops off of your adorable zucchinis. Scoop out the insides and chop up approx. half of them and add it to the meat mixture. Let this simmer for another 5 minutes.


Inside of the hollowed out zucchinis, place a good amount of provolone cheese (as much as you like) and then fill to the brim with the meat mixture. Top each one with a generous amount of Parmesan cheese. Place in a deep baking dish with an inch of water. Cover tightly with aluminum foil. Bake for 30 to 35 minutes until zucchinis are tender but not mushy. Serve with a salad and crusty bread.


Love Ya, Foodies!

P.S. I should be posting my video on Saturday. I'm excited to share it with you!

Tuesday, November 2, 2010

Pirate Booty

Ahoy me hearties! These here pirate booties are the cutest around!

We didn't do much for Halloween this year. I threw some costumes together at the last minute. Being a pirate is cheap, easy and adorable. Put a wife-beater shirt with some old jeans that you have shredded around the bottom, slap on a bandana and a kohl-liner moustache...TAH-DAH!

Isn't she lovely? I think she may need a smidge more ribbon.

Being a Princess/Ballerina is easy too. Tu-tu with some make-up and a bow. Word to the wise: Avoid applying make-up (especially eyeshadow of the purpley-black persuasion) while holding a squirming, screaming, irritated 15 month old. It makes for uneven application and a subsequent black-eye look on your princess. Ugh. Sorry, Boo.


Always look tough when you are pirate, even if your a big softie. (He's my little marshmallow)


Can you guess how many takes it took to get this okay photo? Try fifteen. Tiny was determined to scream the whole time. I don't know what was going on with him, but he was a pirate mess. I was directing Bubba and Boo to run and stand next to Tiny wherever he stopped in the yard. So when he actually stopped moving, I would start yelling, "Go! Go! Go! Stand next to him! Hurry!" And then I would furiously snap away. This was the only pic that had all three looking at the camera. It was pretty hysterical.


Pirates don't steal lawnmowers! (He does look a little confused.)

I hope you all had a great weekend. I am working on my video for Challenge #7. (that's why there is no recipe in this post, just shameless plugging of my overly-cute kids.) Think theatrical and indulgent. It will be up this weekend. They gave us an extra week to make our videos! 

Hopefully I get another post in before that...

Love ya, Foodies!
Related Posts Plugin for WordPress, Blogger...